Preparing a tablet for use as a kiosk relates to editing the tablet settings to improve overall functionality and device longevity. Many default settings and apps compete for WiFi access and drain battery power, and this can be detrimental to user experience and the life of the device.
Use the steps below to disable certain apps and settings, preparing a v1 iPad Air for long term success as a kiosk.
TABLE OF CONTENTS
- Device Settings
- Configure Kiosk Mode for iPad
- To Change the Kiosk MODE URL
- Organize Home Screen icons
- Enable Guided Access
- Backup iPad Configuration to iCloud
- Sign Out of iCloud
Device Settings
Power the device on and the “Hello” screen will appear.
- Press the Home button to open to start set-up.
- Select a Language > select “English”.
- Select Your Country or Region > select “United States”
- On the Quick Start screen, select “Set Up Manually”
- Choose a Wi-Fi Network and log into the Wi-Fi.
- On the Data & Privacy screen, select “Continue”
- On the Create a Passcode screen, select “Passcode Options” > then select “Don’t Use Passcode” > then select “Don’t Use Passcode” again.
- On the Apps & Data screen > select “Don’t Transfer Apps & Data”
- Enter your Apple ID & Password
- Note: If you do not have one, you’ll need to create one in order to operate the tablet and download Kiosk Mode for iPad from the App Store.
- On the Terms and Conditions screen > select “Agree”
- On the Express Settings screen, select "Continue”
- On the Keep Your iPad Up to Date screen, select "Continue”
- On the Screen Time screen, select "Set Up Later in Settings”
- On the App Analytics screen, select "Don’t Share”
- On the Quick Access to the Dock screen, select "Continue”
- On the Switch Between Recent Apps screen, select "Continue”
- On the Quickly Access Controls screen, select "Continue”
- “Welcome to iPad” message will display > select Get Started.
Configuring the Settings
- Click into the Settings App and on the General tab click:
- In the AirDrop tab > select “Receiving Off”
- In the Handoff tab > toggle the button to Turn Off “Handoff”
- In the Multitasking & Dock tab > toggle the buttons to turn off the following: “Allow Multiple Apps”, “Picture in Picture”, “Gestures”, and “Show Suggested and Recent Apps”
- In the Background App Refresh tab > toggle the button to Turn Off “Background App Refresh”
- Once that is done, go into the Finish Setting Up Your iPad tab.
- Select “Set Up Passcode”
- On the Create a Passcode screen > select "Passcode Options” > select "Don’t Use Passcode” > confirm by selecting “Don’t Use Passcode”
- Next, go into the Bluetooth tab.
- Toggle the button to Turn Off “Bluetooth”
- Next, go into the Notifications tab.
- In the Show Previews tab > select “Never”
- In the Siri Suggestions tab > toggle the buttons for each app and turn them off.
- Go through each tab starting from App Store to Wallet > toggle the buttons to Turn Off “Allow Notifications”
- After Notifications are all off, go into the Sounds tab.
- Toggle the button to Turn Off “Keyboard Clicks”
- Next, go into the Control Center tab.
- Toggle the button to Turn Off “Access Within Apps”.
- Then, go into the Display & Brightness tab.
- In the Auto-Lock tab > select “Never”
- Go into the Siri tab.
- Toggle the button to Turn Off “Press Home for Siri” > select “Turn Off Siri”
- Toggle the button to Turn Off “Suggestions in Search”
- Toggle the button to Turn Off “Suggestions in Look Up”
- Toggle the button to Turn Off “Suggestions on Lock Screen”
- Go through each tab starting from App Store to Voice Memos > toggle every button that appears to Off
- Next, go into the Privacy tab to verify that “Location Services” is Off.
- If on, in the Location Services tab > toggle the button to Turn Off “Location Services” > select “Turn Off”
- Go to the Messages tab.
- In the Send & Receive tab > select "Apple ID: username@icloud.com” > select "Sign Out”
- Go to the FaceTime tab.
- In the Apple ID: username@icloud.com tab > select "Sign Out”
- After, go into the Music tab.
- In the Apple ID: username@icloud.com tab > select "Sign Out”
- Then, toggle the button to Turn Off “Show Apple Music”
- Then, go into the Photos tab.
- Toggle the button to Turn Off “iCloud Photos” > select “Remove from iPad” > confirm and select "Remove from iPad”
- Go into the Game Center tab.
- Toggle the button to Turn Off “Game Center”
Configure Kiosk Mode for iPad

Sign-in to iCloud on the iPad, open the Apple Store and download Kiosk Mode for iPad.
After downloading and opening the app:
1. Go to the Homepage section
2. Enter the URL for your kiosk (ex: https://kioskname.mkiosk.info)

3. Click the "Save" button below to launch your digital kiosk

Note: The Kiosk Mode for iPad doesn't have any settings preventing access to the Home Page of the tablet by clicking the Home button. To prevent this and disallow access to the Home Page, enable Guided Access.
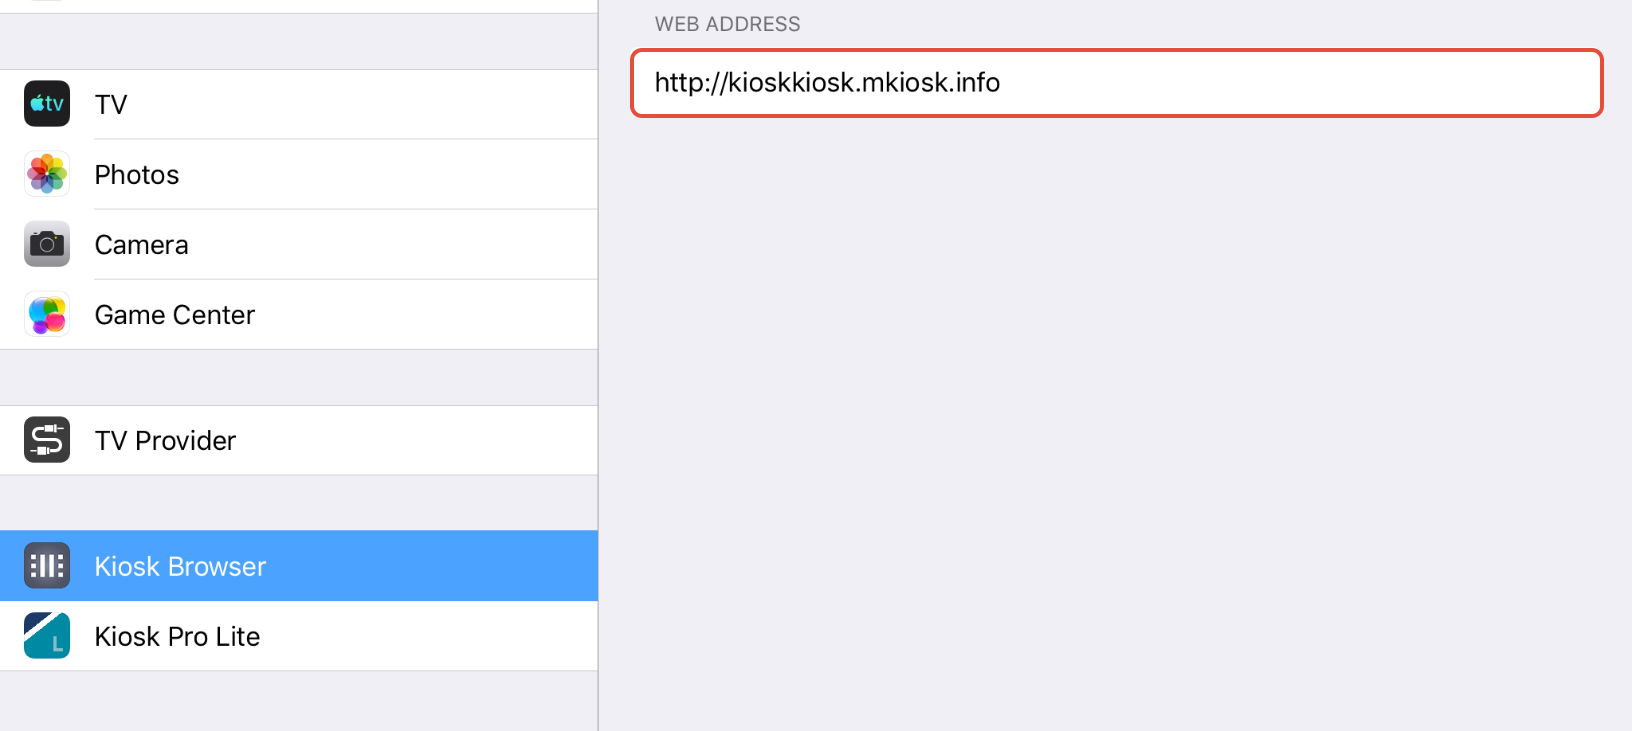
To Change the Kiosk MODE URL:
1. Click the iPad's Settings icon

2. Scroll to the bottom of the page

3. Click the Kiosk Browser icon and change the Web Address as needed
Organize Home Screen icons
- Click and hold an app until they all begin to shake.
- Click the “X” to remove and uninstall every app that has one except Kiosk Mode for iPad.
- Then, drag one app on top of another app to create a folder.
- Drag the remaining apps one by one into that folder except for Kiosk Mode for iPad and Settings.
- Drag Kiosk Mode for iPad, Settings, and the app folder onto the dock bar at the bottom of the screen.
- Press the Home Button to secure the new app placements.
Enable Guided Access
Follow the instructions below to protect the kiosk URL with a pin and prevent access to the tablet's Home Page.
After configuring Kiosk Mode for iPad:
1. Click the Home Button > Go to iPad Settings > General Tab

2. Click Accessibility > Guided Access

3. Turn Guided Access ON
4. Click Passcode Settings

5. Click Guided Access Passcode and set the passcode > Guided Access is now ready to Activate Kiosk Mode for iPad.

Note: on iPad Air or iPads running iOS12+, there's another option called Mirror Display Auto-Lock that you would have to toggle ON.

6. Click the Home button > Click the Kiosk Mode for iPad icon and make sure that the kiosk is displaying
7. Press the Home button three (3) times, and the Guided Access Options should display
8. Click the Hardware or Options buttons and choose which options to allow
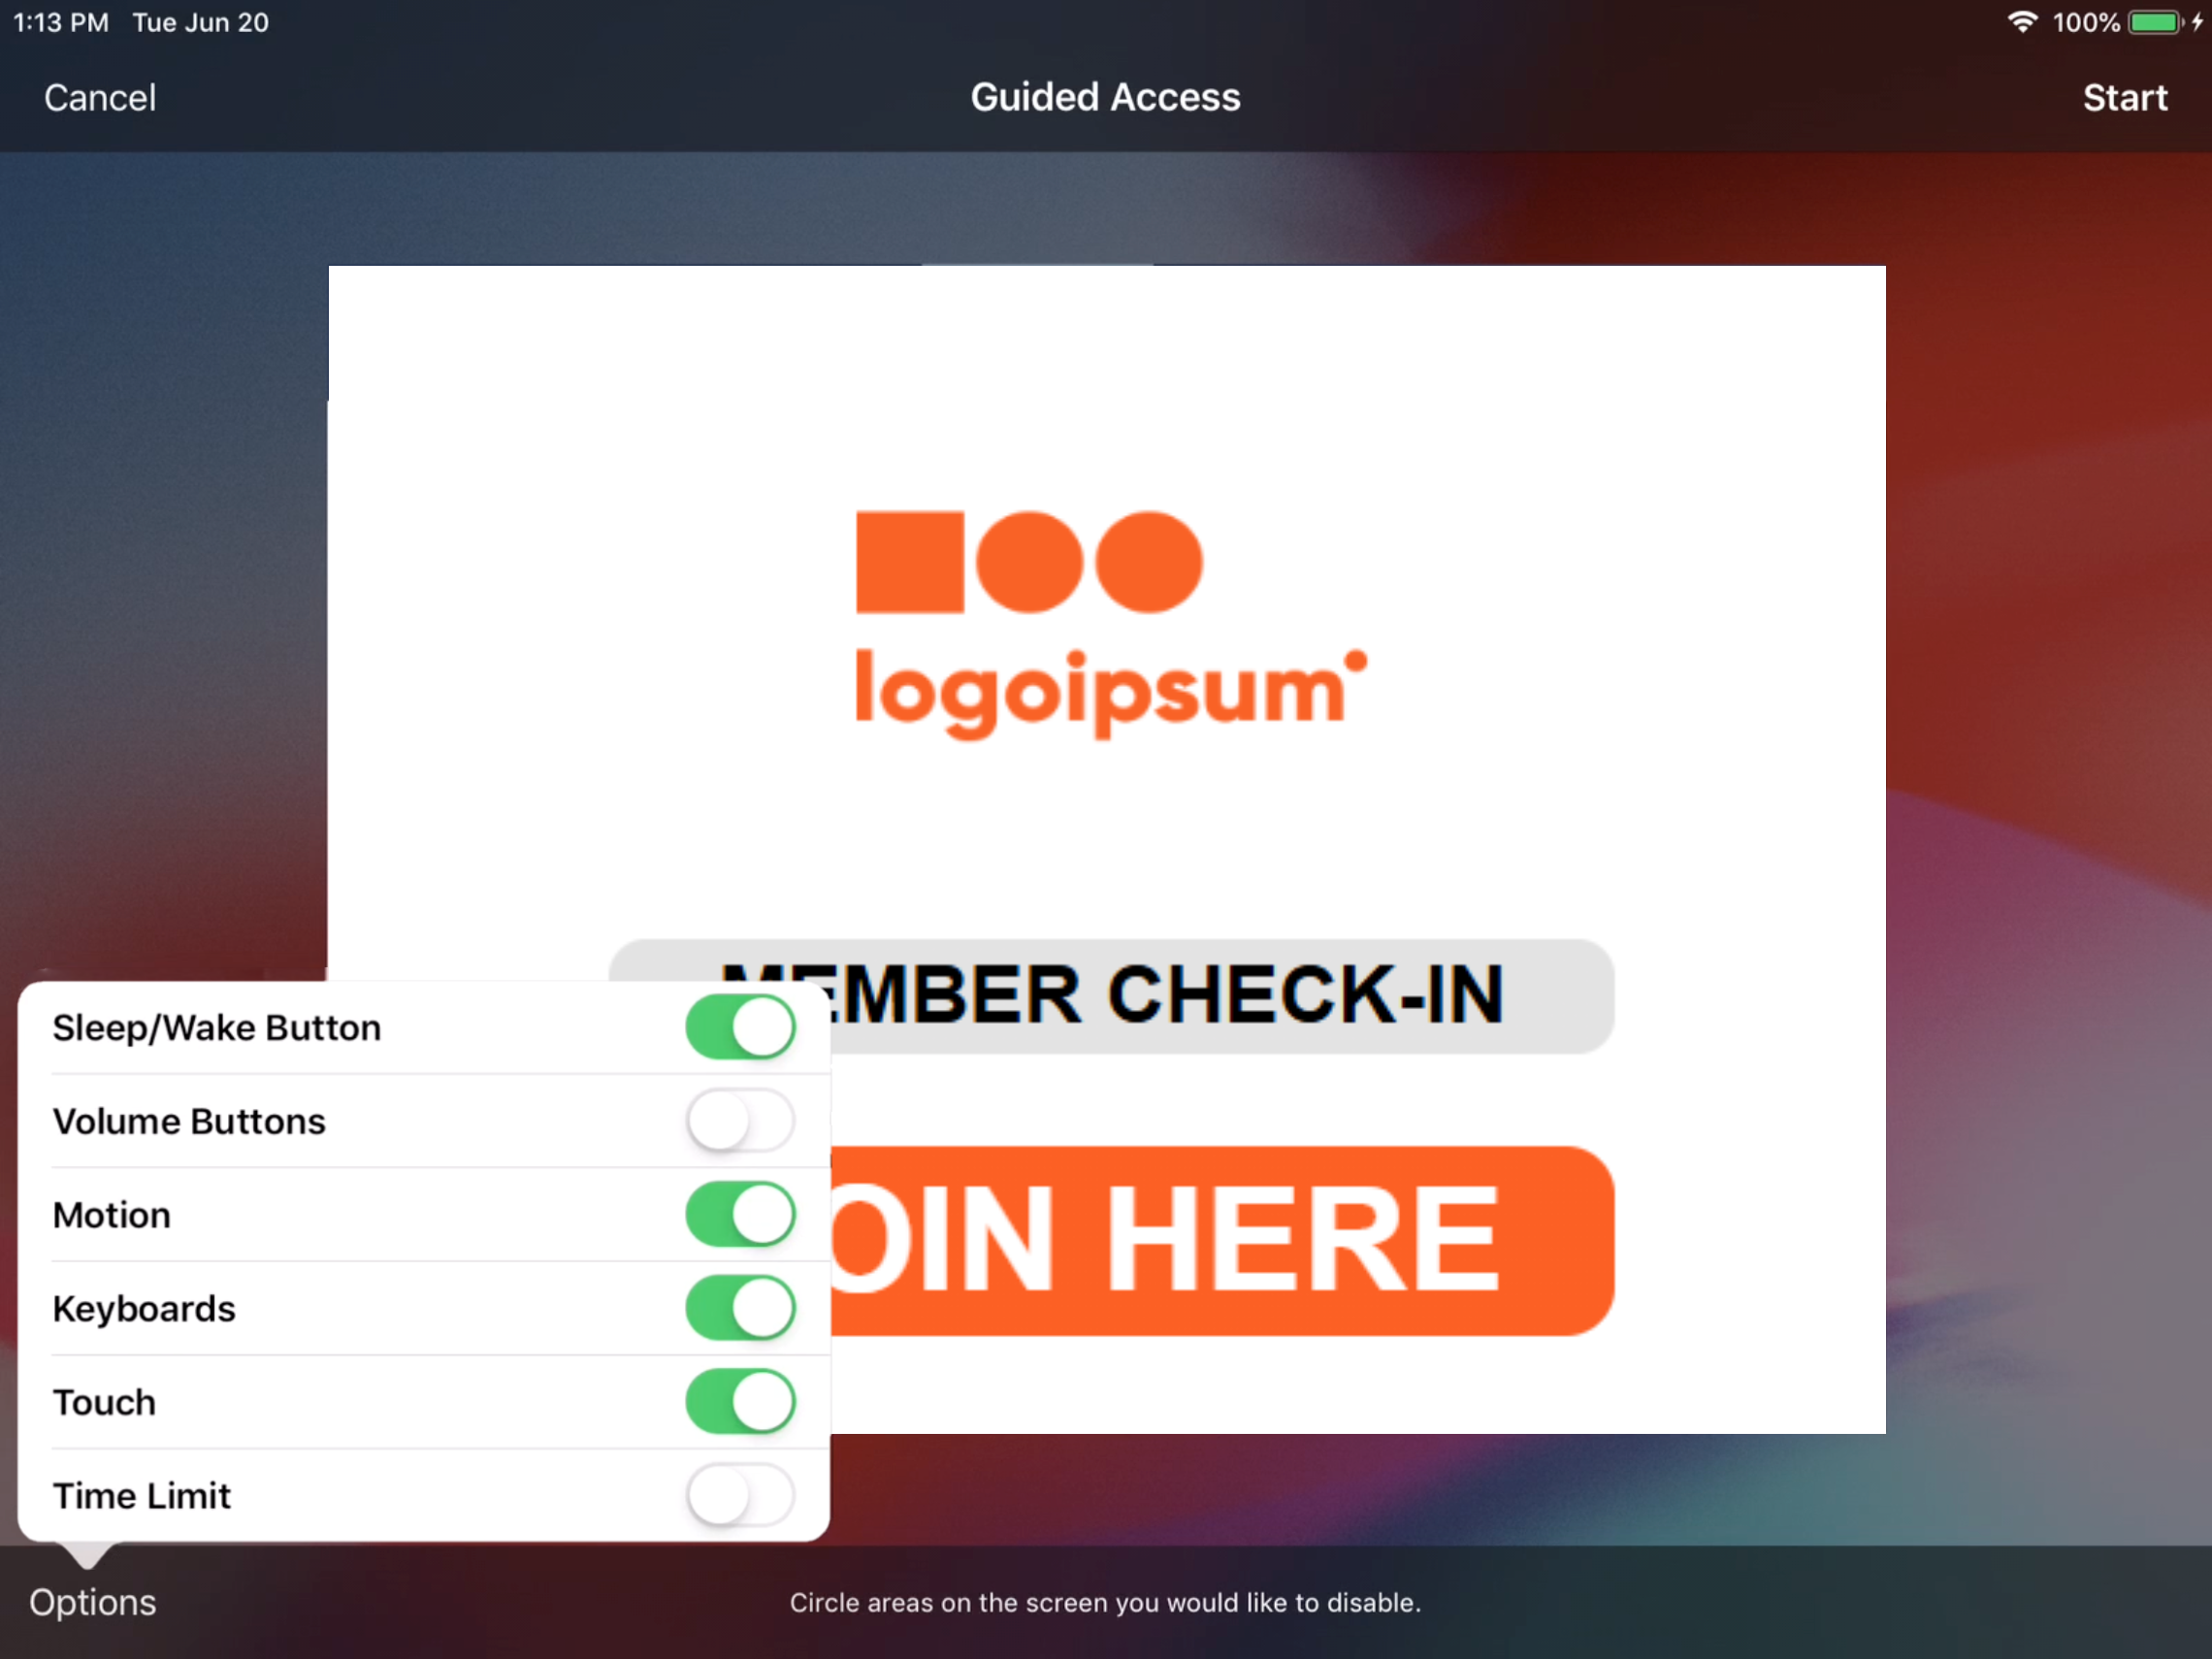
11. Click Start to lock Kiosk Mode for iPad in Guided Access mode.
Skip the “Backup iPad Configuration to iCloud” section if iPads will be set up manually moving forward, or if configurations have been backed up to iCloud already. To finish your setup, go to the Sign Out of iCloud section.
Backup iPad Configuration to iCloud
This section saves the iPad’s configuration to iCloud and will help expedite future iPad setups, avoiding most of the manual configurations. It saves all of the settings setup in this guide as well as the Kiosk Mode for iPad settings (including the Kiosk URL)
Note: This should be done once to avoid confusion and multiple Backups.
- In the Settings app, go into the iCloud Profile tab.
- Starting with Photos to Find My iPad > Toggle each button to Off and follow prompts (if they appear)
- In the iCloud Backup tab > select “Back Up Now”
- Confirm the Backup was successful below, a “Last successful backup: [TIME]”
- Proceed to Sign Out of iCloud to finish the setup.
Sign Out of iCloud
This step is advised to prevent people with access to the iPad settings from downloading from the Apple Store and seeing other connected devices.
- Go into the iCloud Profile tab.
- Verify all the iCloud settings are off.
- Scroll to the bottom of the iCloud section, there should be a “Sign Out” button.
- Click “Sign Out”
- A confirmation window will appear, confirm by clicking “Sign Out”
- Then, go into the iTunes & App Store tab.
- If still signed in, Click “Apple ID: username@icloud.com”
- A pop-up will appear, click “Sign Out.”
CONGRATS! The device is now ready for kiosk use.